
Have you ever receive the following message when you plug your USB 3.0 drive into your computer?
This USB Mass Storage Device can transfer information faster if you connect it to a Super-Speed USB 3.0 port.
I’ve been facing this issue since Windows 8. The USB 3.0 just won’t work in Windows 8 and 10. I’ve tried many methods such as uninstalling the USB drivers, unplug and replug the USB drive, etc and none of it fix the issue. And I finally found the culprit! Read on for more details.
The reason why it is not working in Windows 10 (I believe it is applicable for Windows 8 as well) is because of the “Fast Boot” option. I can’t remember where I read it before, but it seems when the “Fast Boot” option is enabled, the USB 3.0 is not loaded properly when your computer start. Because of this, the USB 3.0 is not working. There are 2 options that you can choose to avoid fast boot:-
Method 1: Restart Your Computer
When you restart your computer, Windows will load normally without fast boot. Your USB 3.0 should be working as intended after restart. But this is just a temporary solution and will be very troublesome if you need to restart every time to get the USB 3.0 working. Please see Method 2 for a more permanent solution.
Method 2: Disable Fast Boot
Fast Boot is actually an option that allows you to load Windows faster. How it works is that it will “hibernate” instead of shutting down completely when you shut down your computer. So, the next time you start your computer, it will wake from the “hibernate” instead of loading everything again. If you are using SSD or is not concerned about the loading time, you can safely disable the fast boot option. To disable, follow the steps below (applicable for Windows 10):-
- Go to Start and search for Power Options.
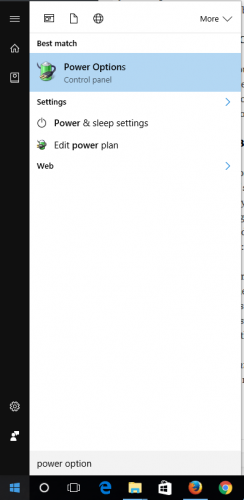
Go to Start and search for Power Options.
- Click on “Choose what the power buttons do” on the left.

Click on “Choose what the power buttons do” on the left.
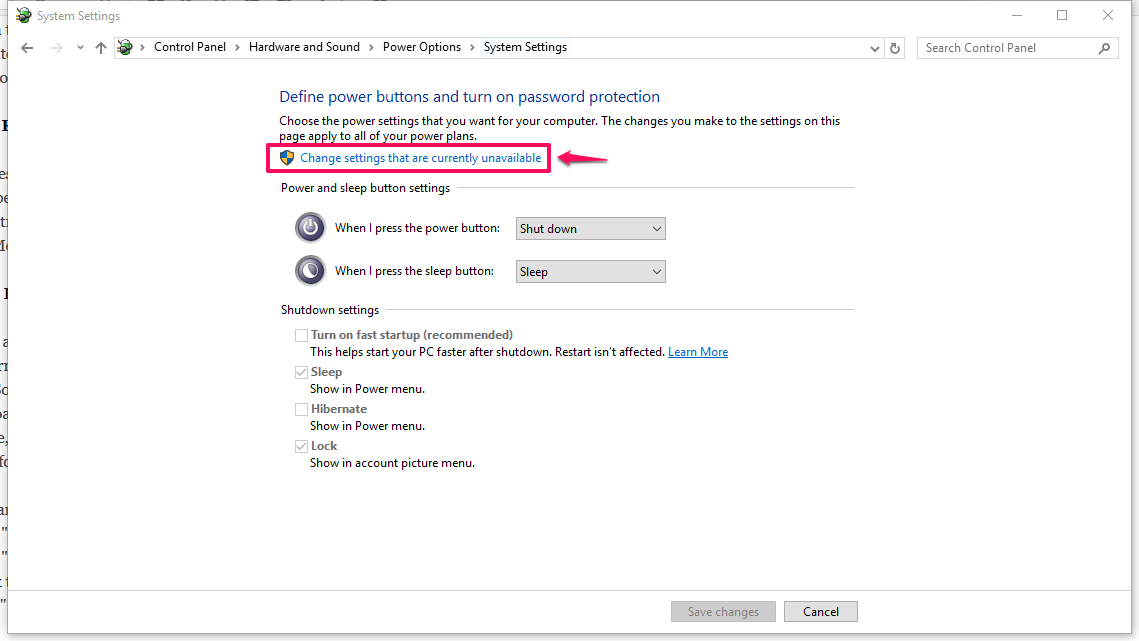
- Click on “Change settings that are currently available”.

Click on “Change settings that are currently available”.
- Uncheck the “Turn on fast start up (recommended)” option. The click the “Save Changes” button to save the changes.

Uncheck the “Turn on fast start up (recommended)” option. The click the “Save Changes” button to save the changes.


But do note that Windows might turn this option back on when you update Windows later on. This seems to happen to me. Just follow the steps above again to disable it.
Hope this guide helps!